You shall teach them diligently to your children, and shall talk of them when you sit in your house, and when you walk by the way, and when you lie down, and when you rise. -Deuteronomy 6:7

Showing posts with label Montessori Math - Upper Elementary. Show all posts

Monday, July 15, 2013

Using the Montessori Peg Board


Here are two examples of pre-algebra Montessori “work”

The Peg Board

The Peg Board has many uses, here is the example we worked on this week.  The purpose is to take a square and make it into a smaller square that is equivalent to the larger square. 

For this example, we took the number 625.

First, my son "D" takes the units pegs (units are always identified as the green color, tens are blue and hundreds are red.)  At this age, he is already well prepared to have the amounts represented by just a color – so there is some abstraction in this work that has come with years of being in the Montessori classroom using these representations.

Here is the peg board with the units pegs in a square that is equal to 625. 


Second, he now counts over 10 pegs from the side, and replaces each row of 10 with a blue peg (which represents 10.)
 

Third, he continues with this process of replacing rows of 10 pegs, with a blue peg.


Fourth, he then begins to replace rows of “10s” pegs with the 100’s peg (red) where he is able.

This process continues until the smallest square possible is built – equivalent to the original square of 625!  From here we can see that 625 is equal to 25²

He learns to document this process as well as he goes along.  Which you'll see in the next example.


Working with Squared Numbers
For this one, I’ll use the same numbers for sake of ease.
Materials needed include:
  • Montessori Decimal Bead set (up to the ten bars)
  • Montessori number tiles (I take them from the checkerboard multiplication set we have)
  • Pipe cleaners – used for the “()” in the problem
  • Cuts of paper with “+” and “X” on them.
  • Montessori “hundreds” squares (each represent 100 beads)
Working to find the answer to 25²
First, we agree on a few things:
We agree that 25² = (20 + 5)² = (20 + 5) X (20 + 5)
Now he can work on the problem visually to come to his answer.
Step 1: He lays out the problem using the actual amounts shown by the beads. (See part of the problem built out visually below)
The "2" is in blue which represents the 10s place, making the 2 stand for "20".

Step 2: Once he has the two rows of the problem both written and shown visually with the beads and tiles, he begins to use the hundreds squares and beads to find and show the answer to the problem.


As he finds the answers, he finds he will need 4 hundreds boards (represented by the squares) and then he finds how many 10 bars he will need - and places them in the binomial square shape (which he is already familiar with from previous works.
The binomial square!

So he finds that he needs 400 + 100 + 100 + 25
400 - represented by the 4 100s squares
100 + 100 represented by the 10s bars
25 represented by the 5 bars (light blue bars have five beads on them)
His written notation looks like this:

From here he can work through the answers to multiple problems, practicing the steps over and over as well as practicing writing out the problems in his math notation workbook.
I didn’t know how to do this until Jr. High school, (and even then it was pretty shaky) but perhaps if someone had shown me how all squared numbers actually make a square – I might have found it interesting and concrete enough to try a bit harder.  I’m looking forward to practicing this myself so I can help my daughter prepare for algebra the same way!
If you'd like more examples of this with more detailed instructions or pictures, feel free to contact me and I'll be happy to share examples to help you along!


Montessori Algebraic Pegboard - Square Roots


Here’s my first attempt. I'm starting with something very easy! This example uses some affordable materials that can be repurposed for many different math concepts. In this example, the goal is to help the child understand how to find a square root of a number with two periods.


FINDING THE SQUARE ROOT OF 625 ON THE ALGEBRAIC PEGBOARD

Preparing the board to find the square root of 625... Note that Montessori kids already understand that each color represents a value. Green = units, blue = 10s and red = hundreds

We put 6 red beads (6 hundreds), 2 blue beads (tens) and 5 green beads (units) in their respective dishes.  Starting with the red beads we make a square.

Below: Building the largest possible square with 100s pegs, 4 X H square. The student will not be able to add another row to the bottom and right sides with the 100s pegs. So they will need to exchange the remaining 100s pegs for 10s, giving 20 more 10s, for a total of 22.

Below: Building the largest possible rectangles with 10s pegs
Below: Completing the square of 625 with units pegs. They have now built a complete binomial square. They find the square root by counting the values of the pegs along the bottom or right side. Each of these sides has two 10s and five units. They review that these values can be written as a binomial (20 + 5) or as a monomial (25).
Below: The square root of 625 is 25
We repeat this activity with several numbers between 100 and 9,999 that have square roots without remainders, and then advance to numbers with square roots with remainders.

If you're thinking, "Well, that was a lot of work when there are many shortcuts that could have been taken." I'd say - you're right. But the purpose behind all Montessori materials is to first be sure the child has a deep understanding of what is happening in an operation, before he is shown any shortcuts. This develops a deeper understanding that will last a lifetime, rather than a memorization of steps that last only until the test on Friday.

The saying is really true... "To teach is to learn twice." Although, I'm not sure I ever learned the first time, so I'm thrilled to be able to learn it now! Particularly since these materials make it fascinating and fun. I can't count how many times I've said, "OH, so THAT'S why they taught me to do the steps that way in school!"

Sunday, July 14, 2013

Montessori Decimal Board and Decimal Checkerboard

Montessori Decimal Board

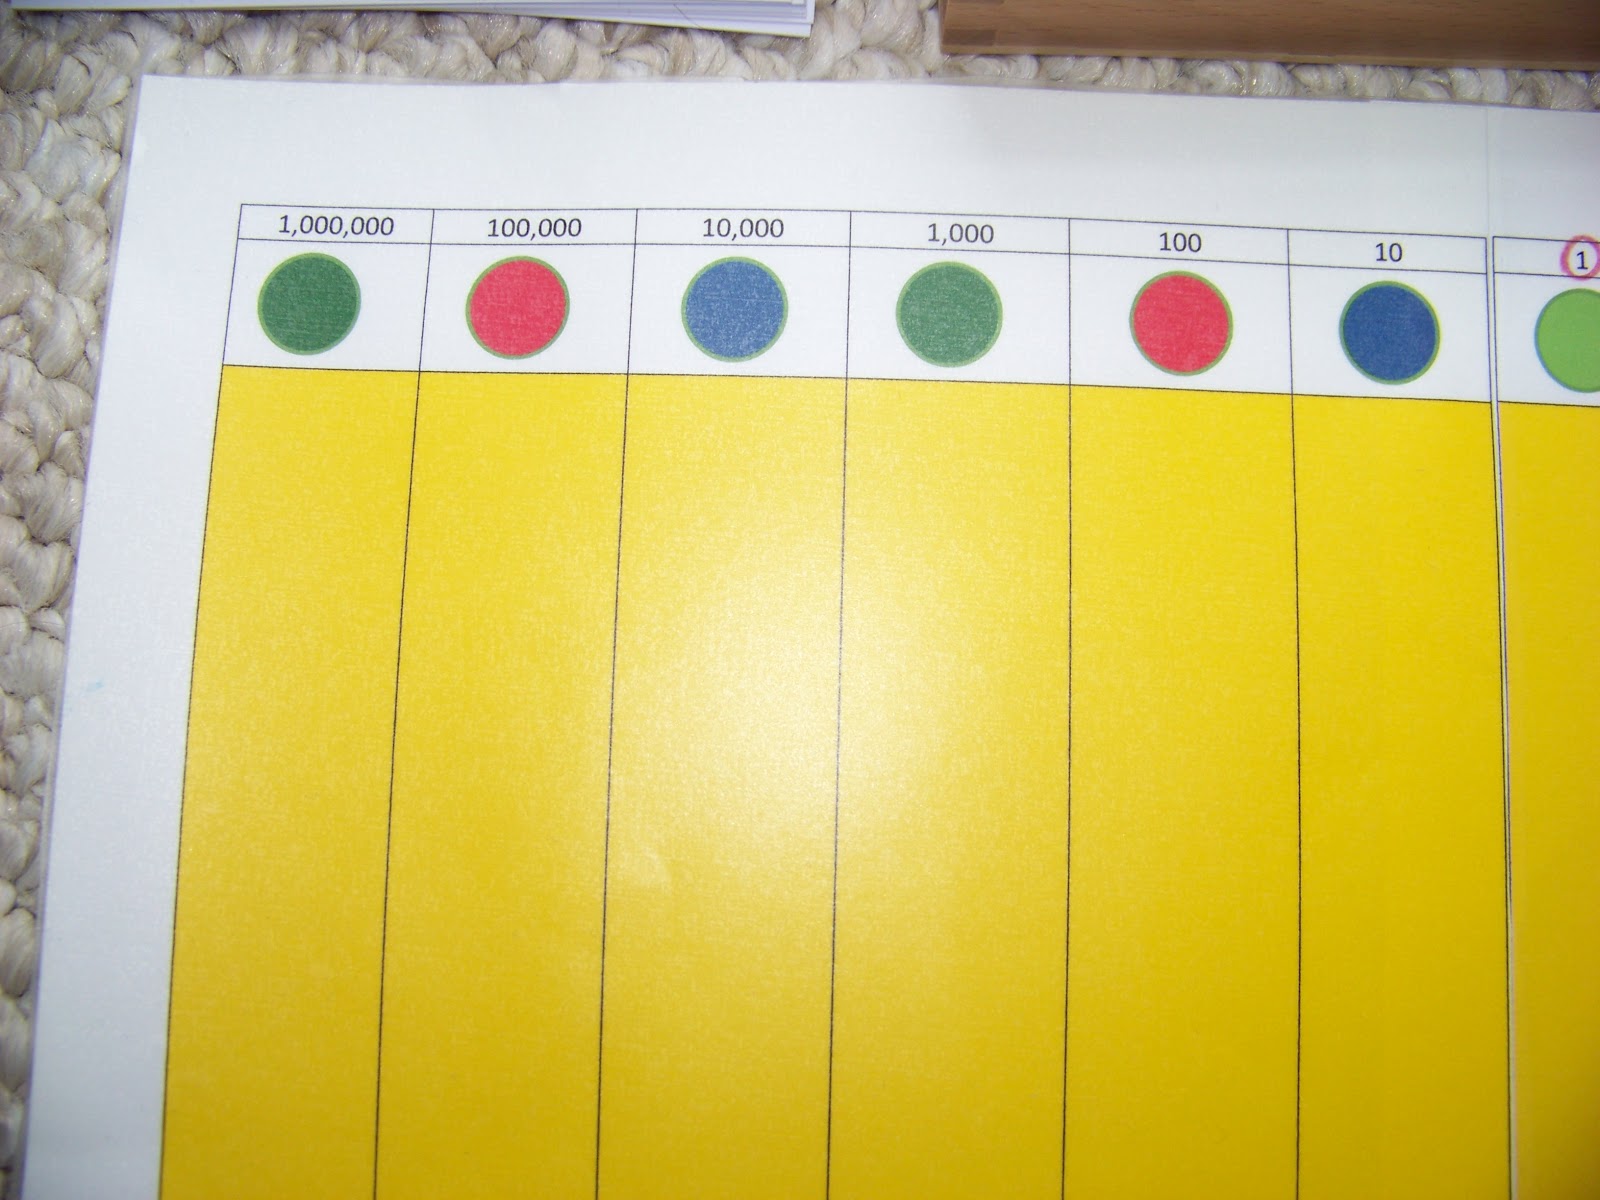
After a child is familiar with the symbols representing decimals, he is ready for the decimal board.  I knew my son would be quick to move from concrete to abstract so I hated to spend the money on the decimal board if it would only be used once or twice.  So I made my own using Word and three pages, cut and then laminated together.


I did finally purchase the blocks and numbers to go with the board, knowing I could use them for my younger child later.

There were several introductory lessons for this board, but I was able to cover them all in just one lesson.  I would imagine for a child with less experience you would need to plan on multiple lessons over the course of days or weeks.

The decimal board is 13 vertical yellow columns with represent the hierarchies.  We use the typical Montessori colors (using blocks) to represent the amounts.

Formation and Reading of Quantities

The blocks are in the standard Montessori colors he is familiar with.  He already knows that red is hundreds, blue is tens and green is units.  But the new colors are pastel colors.  They represent numbers LESS than one. 

Once this is understood, I form a quantity on the board using the squares and I ask him to read it.
This board has the quantity: 2 hundreds, 4 tens, 1 unit,
3 tenths, 1 hundredth and 2 thousandths.

Then I ask him to create quantities on the board.  For example, I might say:  Give me two units, three tenths, three hundredths.”  I start out calling them independently – instead of “two and thirty-three hundredths.”

Once I’m sure this is mastered, we go on to using the decimal numeral cards.  The numeral cards tell us the decimal number’s “first name.”


0.1   = one tenth

0.01  = one hundredth
0.001      = one thousandth
3.27 = three units and twenty-seven hundredths

We build using this concept and then discuss the fact that whole numbers increase from the unit and decimals decrease from the unit.  I put a little crown on the 1 (unit) on the board to represent it being the backbone of the whole system.

We also spent time talking about adding, subtracting and multiplying decimals using this board.  There is quite a lot you can gain in terms of skills and understanding decimal concepts with this board.  I highly recommend it for a child that needs a more concrete way to “see” how and why it all happens.

We didn’t spend much time on this board because of his current knowledge.  If you’d like to have all of the lessons associated with the Decimal Board, you can purchase them for only $11.00 at this site:


The Decimal Checkerboard

The Decimal Checkerboard is similar to the Checkerboard used for multiplication of large numbers.  Only this board is set up specifically for numbers greater AND smaller than one.

To the left of the unit and above the unit is always a higher hierarchy.

To the right of the unit and below the unit is always a lower hierarchy.

Whole numbers are still represented by dark green, dark blue and red.

Decimal numbers are represented by light blue, rose/pink, and light green.


First, I put labels all over the board to help my son see what each square represents.

Then I asked the question:  If I were to put a bead (a bead representing 1) on every square of this board, what value would the board have?” 
The Answer: 1,234,567.654.321


Next we worked on problems – a whole number as the multiplier, times a decimal number as the multiplicand.
The multiplicand is 5.312 - shown at the bottom of the board.
It is the decimal number as shown above.

The multiplier is 143.  It is shown along the right-hand
side of the board.


Step 1:  Place the numbers on the board for the multiplier and the multiplicand. (As shown above.)


Step 2: Begin the multiplication with the lowest hierarchy in the multiplier, placing the appropriate number of bead bars.  When multiplying the unit, place the bars in the same squares on which the multiplicand cards are placed.


Step 3: When all the unite multiplication is completed, we can exchange for any quantities that are over nine.

 I have him read the partial product and write it in his math notebook.

Then he turns over the unit multiplier label and beings the multiplication with the tens multiplier.  He continues in a similar manner until all are complete.
When an amount is over 9, as in the example above, the tens place is
shown in the next square to the left - which represents "carrying"
the number over as you would do on paper.


Step 4: Once complete, he moves all the bead bars down the diagonal to the lowest row on the board.


He makes any exchanges necessary.

Step 5: He reads the product and records it in his math notebook.


He loved the checkerboard – and performed problems nearly every day for a few weeks, just for the fun of it!
We've since moved on to more challenging things.  But I'm glad to have a better handle on the proper use of this, so I will be able to show my younger child in a year or so!